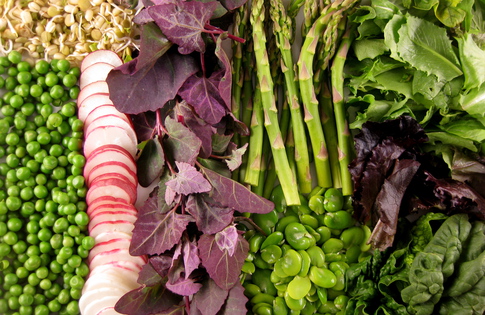
Treat this as a guide for preparing and storing the vegetables for your salad that evolves throughout spring. Finish it with a good dressing, nuts, seeds or cheese.
Spinach, Spring Greens & Sprouts
Make your own bag of ready salad greens from garden fresh greens:
Dunk in a bowl of cold water. Swirl around. Lift out the greens. Dump the dirty water or water plants with it. Repeat this until the water is clean. When the greens are delicate, take care not to mash them as they can bruise easily and become slimy faster throughout the week.
Gently lay the greens on a dish towel to air dry (away from any sunny windows) or whirl dry in a salad spinner.
Store in a large container or plastic bag with plenty of room. Place a paper towel in with the greens to absorb any additional moisture so they last longer.
Asparagus
Rinse well, shake dry. Gently break off the ends of the asparagus- there will be a natural break usually about 1-3 inches from the bottom. This removes the tougher inedible part. Store in a sealed container whole. When it is time to enjoy, cut it roughly into 2 inch pieces on a diagonal.
Radishes
Remove the greens. Wash while scrubbing the outside lightly to remove any dirt. Thinly slice in paper thin disks. Store in a sealed container.
Carrots
Scrub the skin or peel. Garden fresh carrots often oxidize and brown up faster, but they are still edible and delicious. Grate or slice paper thin into rounds. Store in a sealed container.
Baby Beets
Scrub the skin or peel it. To enjoy raw, grate or slice into paper thin slices.
To cook, bring to a simmer for about 15-25 minutes, depending on their size, until a fork easily cuts into the beets. Cool. Remove any skin hanging off. Thinly slice.
Store cooked or raw beets in a sealed container.
Peas
Bring a pot of water to a boil. Prepare a bowl of ice water. Remove the peas from the pod. Place in a mesh strainer. Dunk the peas all at one time for about 30 seconds. Longer if you prefer your peas more tender. You can always sample one to see if it is tender enough for your taste. Remove the peas. Dunk into the ice water or rinse under freezing cold water. Shake dry and store in a sealed container until ready to use.
Fava Beans
Follow directions for the peas… until the very end, after the beans have chilled out for a couple of minutes. Remove and shell them again out of the waxy coating. Making a small slit in the coat is helpful to peel them off. Store in a sealed container.


